
Wow, I've been gone for a while, haven't I?
Today, I'm going to show you a project that I did this past Summer. I was working on a bathroom remodel.
When I first bought my house, a lot of the work I put into it was more of a temporary thing.
Most of my remodels didn't have much thought behind them.
Maybe because the previous owner had such horrible taste that I wanted to quickly cover it up out of embarrassment?
Or maybe because I was still a novice.....and broke.
I don't have any photos of the original bathroom. Here's some old photos I pulled off my blog of the first remodel I gave this bathroom.

I painted the walls yellow in an attempt at being "fun." I did put in that faux wainscoating, but now I realize it was too low.
There's that horrible fan/light (which fans out into my closet?) that's stuck on the wall.
This bathroom has no shower, so moisture really isn't a problem.
And quite honestly, I don't know why the previous owners would want whatever smell was going on in that bathroom to be emptied out into a closet with clothes in it.
In a later post, I will show you the basics of running wires through walls. I changed the light fixture, and put it on the ceiling where it belongs.
Also, that vanity literally takes up half the bathroom. I'm not entirely sure how we even got it out of there. The thing was monstrous, and the bathroom is tiny.
I knew we needed a new one.
I love the look of antique vanities.
I started pricing vanities for the look I wanted:
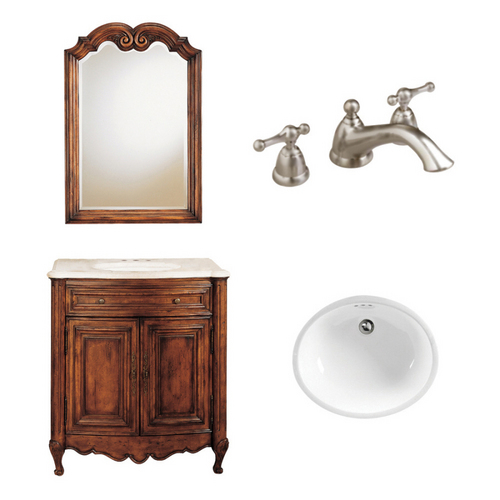
I loved it, but YEESH! That'll put a dent in the ol' pocketbook!
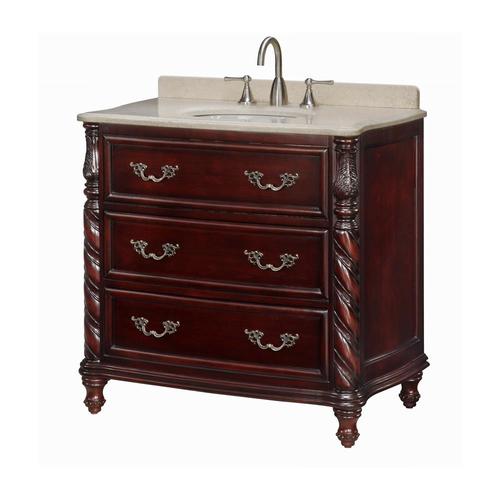
Still out of my price range.
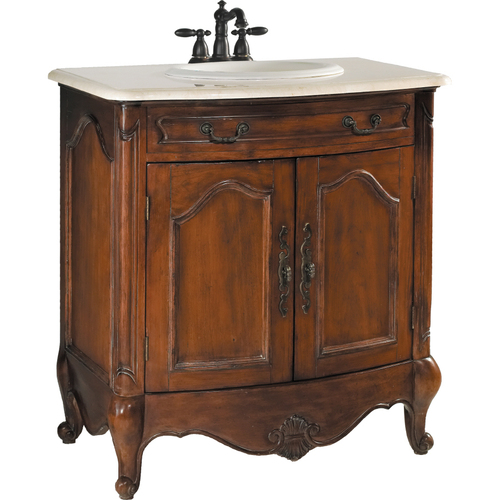
Unfortunately, $400 was still over my budget. Heck, I wanted to pay way less than that for the entire remodel!
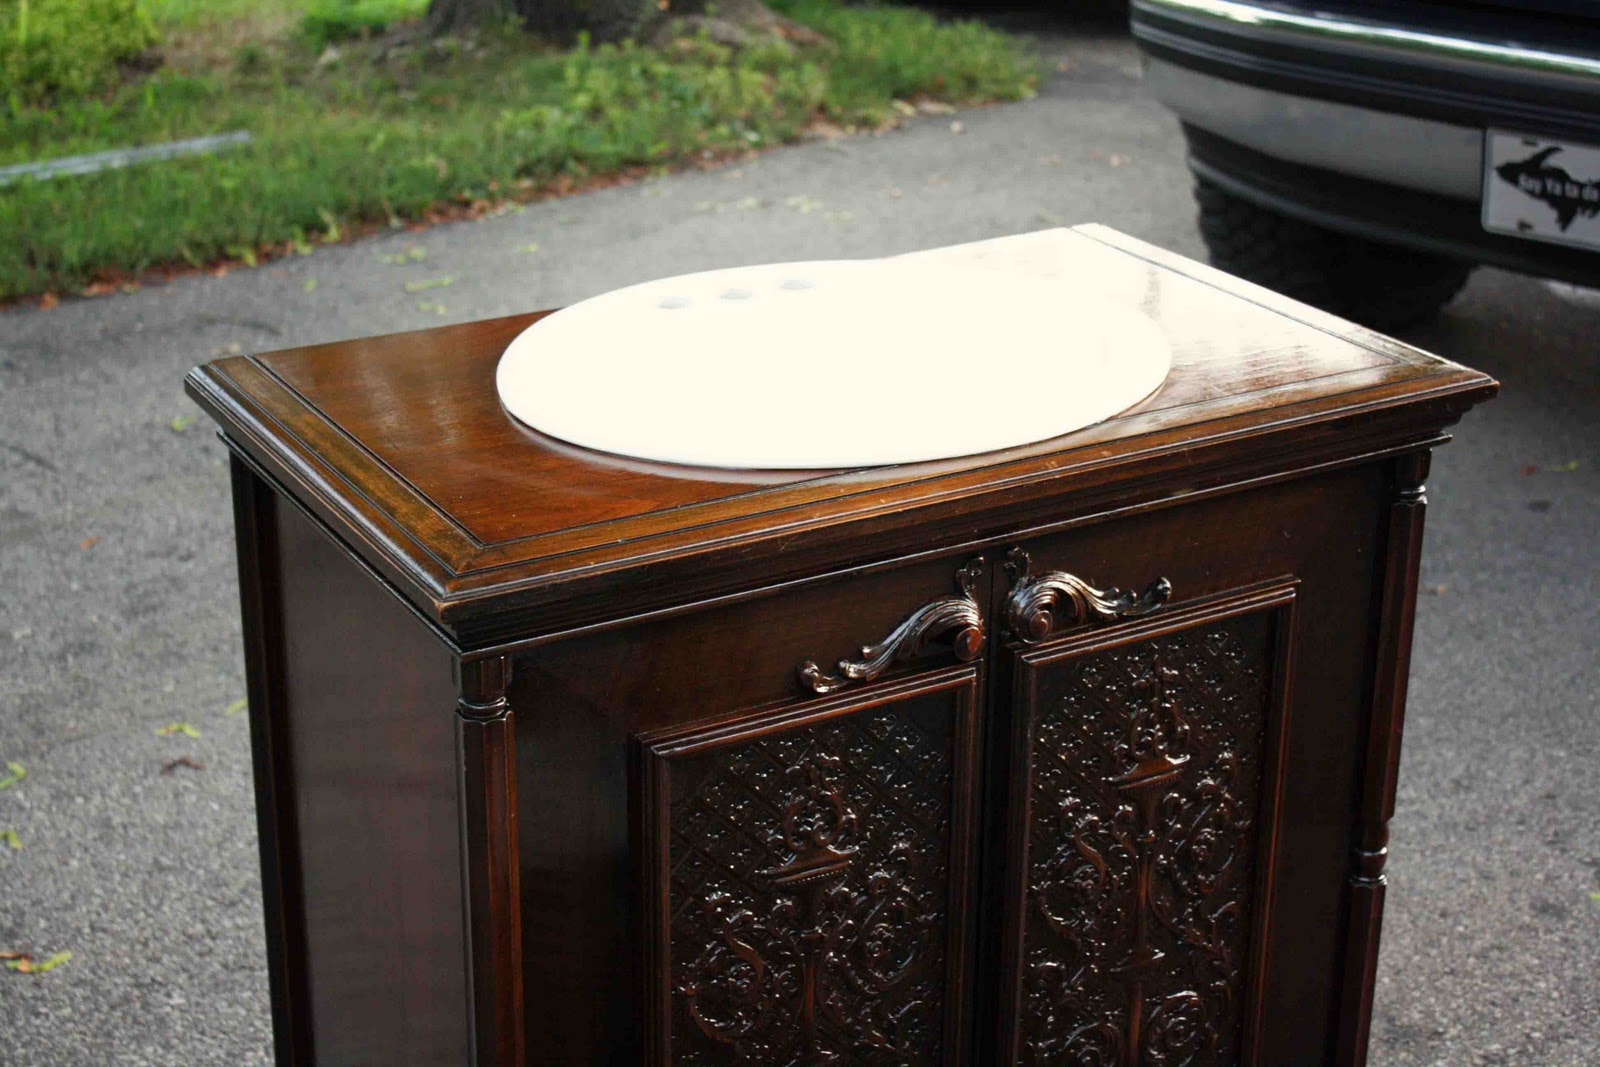
So I searched Craigslist, and wouldn't you know it, I found the perfect antique cabinet! It used to be a radio cabinet.
So I took the old vanity out.
I placed the two vanities back-to-back.

My wonderful husband helped move the cabinets for me.
He's wonderful!
Anyways, putting the cabinets back-to-back will give you a perfect template of where to cut a hole for your plumbing. That way you don't need to take measurements.
Just open up the old vanity, and trace inside the old hole.

Next, lay your new sink on top of your vanity, making sure it is centered, and trace around it.
Make sure the sink is far enough from the back so that you are still able to turn the faucets. The sink shouldn't be flush against the back of the vanity.
Then, trace another circle inside of that, about 1/2 inch inside. This will give the sink a lip to sit on. You will make your cuts on the inside line!

Drill your pilot hole and start cutting with a jigsaw.
Next, squeeze a large bead of silicone all around the lip of the hole. This will keep the sink in place and prevent moisture from getting inside the cabinet.
Then just drop in your sink and "shimmy" it into place!

And you have a new, DIY bathroom vanity.
Total cost without the faucet: $70.
Knowing that your piece is a real antique and that you made it yourself: priceless!
Oh, and a little tip before you try this project:
Measure the height of your old vanity. Try to find one around the same size. While plumbing can be adjusted (I had a slight variation), you don't want a vanity that is uncomfortably high or low.


Great tips!
ReplyDeleteI've wondered how to do this.
I liked the plumbing template tip...however, my plumbing comes straight out of the floor of my pier and beam house. I like the feet on your cabinet..but am afraid something like that would call attention to the plumbing that would be coming up from the floor.
I'll have to figure this one out. But I think yours definitely looks great.
You'll have to show us a picture of it installed...cause now I'm just intrigued!
glad to see you blog. Pat
Beautiful...I have to try this!
ReplyDeleteDid you seal the top of your cabinet before installing the sink?
ReplyDeleteYes, make sure you use a silicone sealant under the lip of the sink before you drop it in. This will prevent water from accumulating by the bare wood that was made from cutting a hole on the top. It will also make sure that the sink doesn't move. For good measure, I also caulked around the sink after I dropped it in. If you are refinishing the surface of the cabinet, you could use the polyurethane to seal the bare wood. I skipped this step, as I had no need redo the finish, but I definitely made sure to seal the sink properly. If the vanity is going to be in an area of high moisture, like a full bath that has a shower, I would definitely seal the bare wood. Rot is your worst enemy!
DeleteHope this helps!