
Anyways, as promised, you get to see my staircase walls redone.
Here's a picture of the stairs before the project began:
 Here's my sad, blank wall (note the awesome drywall seam the previous owners left me):
 I decided that I wanted two black floating shelves on this wall to give it a contemporary feel. Most hardware stores carry them, but I didn't feel like paying $50.
So I put on my workshop (i.e. husband's) shoes and started sifting through my scrap lumber:
 I made a tool for my table saw so that I could get a uniform cut through my lumber. I took a strip of 1/2x3/4 trim and nailed a block to it the distance from the blade that I was going for:
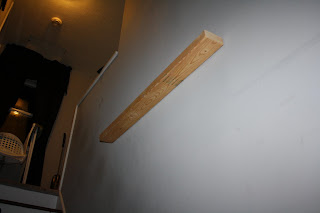
 I sent the 2x4s through the blade, and this is what it should look like afterwards:
Now, of course the ends will still have that slit showing, so just close it up with some wood putty. Let dry and sand
Now comes the fun part!
The shelves were painted black in a high gloss.
The stairs were my favorite part to do. The faces were painted white, then I nailed black house numbers to the front of each step:
 I bought some wooden letters and painted those black:
 My favorite accessory: a chess/checkers set that I got at Younkers for only $15. It was on sale for $30, but I used a $10 off coupon, plus my discount. Nice, right? The best part: it's squares are made to put little pictures in! I love it!
 The kids aren't allowed to play with this one unless their dad or myself is present to supervise.
Anyways, what do you do with all those checkers/chess pieces? Put them in jars!
 The bow was added to the jar to give a little punch. The sister to that bow is hiding in my BIG REVEAL =)
The rest of the pieces that wouldn't fit in the jars were scattered around the self to give an eclectic feel.
 I found some accessories at Goodwill that I really liked:
 Then I hung some photos up:

 And then I was done!
Here are a few shots of the overall look:
From the top:


 From the bottom:


looks great! love that checkerboard!
ReplyDeleteThe checkerboard/chess board is super fun! And I love how the numbers on the stairs turned out!:)
ReplyDeleteLove the staircase. A lot of hard work went into it.
ReplyDeleteSuperwoman does it again!!! :)
ReplyDelete